How To Install Blogger Template
Installing a Blogger template is a relatively straightforward process. Here are step-by-step instructions on how to install a new template on your Blogger blog:

Access Your Blog:
After logging in, you'll see the Blogger dashboard. Click on the blog where you want to install the new template. If you have multiple blogs, make sure to select the correct one.Backup Your Current Template (Optional but Recommended):
- Before making any changes, it's a good practice to backup your current template. To do this, click on "Theme" in the left sidebar, then click the "Backup" button on the top-right corner of the page. This will save a copy of your existing template to your computer.
Upload the New Template:
- In the "Theme" section, you'll see your current theme displayed. Click on the "Backup/Restore" button.
Upload Your Template File:
- Click on the "Upload" button. A file dialog will appear. Locate the XML file you downloaded from your new template (usually named something like "template.xml") and select it.
Confirm Upload:
- After selecting the template file, click the "Open" or "Upload" button (depending on your browser). Blogger will upload and process the template file.
Apply the Template:
- Once the template is uploaded successfully, Blogger will ask if you want to keep widgets or delete them. Choose "Keep Widgets" to preserve your existing widgets (like gadgets and sidebar elements). If you want to start with a clean slate, you can choose to delete widgets.
Preview and Save:
- Blogger will now show you a preview of your new template. Take a moment to review how it looks. If everything looks good, click the "Save" button to apply the new template to your blog.
Customize and Adjust:
- After applying the new template, you may need to make adjustments to your blog's layout, widgets, and colors to fit your preferences. You can do this in the "Layout" and "Theme" sections of your Blogger dashboard.
Publish Your Blog:
- Once you're satisfied with the changes and your blog looks the way you want, make sure to click the "Publish" button to make your blog live with the new template.
- That's it! You've successfully installed a new template on your Blogger blog. Your blog should now have a fresh look and layout based on the template you downloaded and installed.
How To Install Blogger Template
Follow this simple guide to learn How To Install Blogger Templates:
1. Click on the Download button and save file to PC (.xml format).
2. Log in Blogger dashboard.
3. Go to Template section → Backup/Restore.
4. Click on Download Full Template to Backup your previous template.
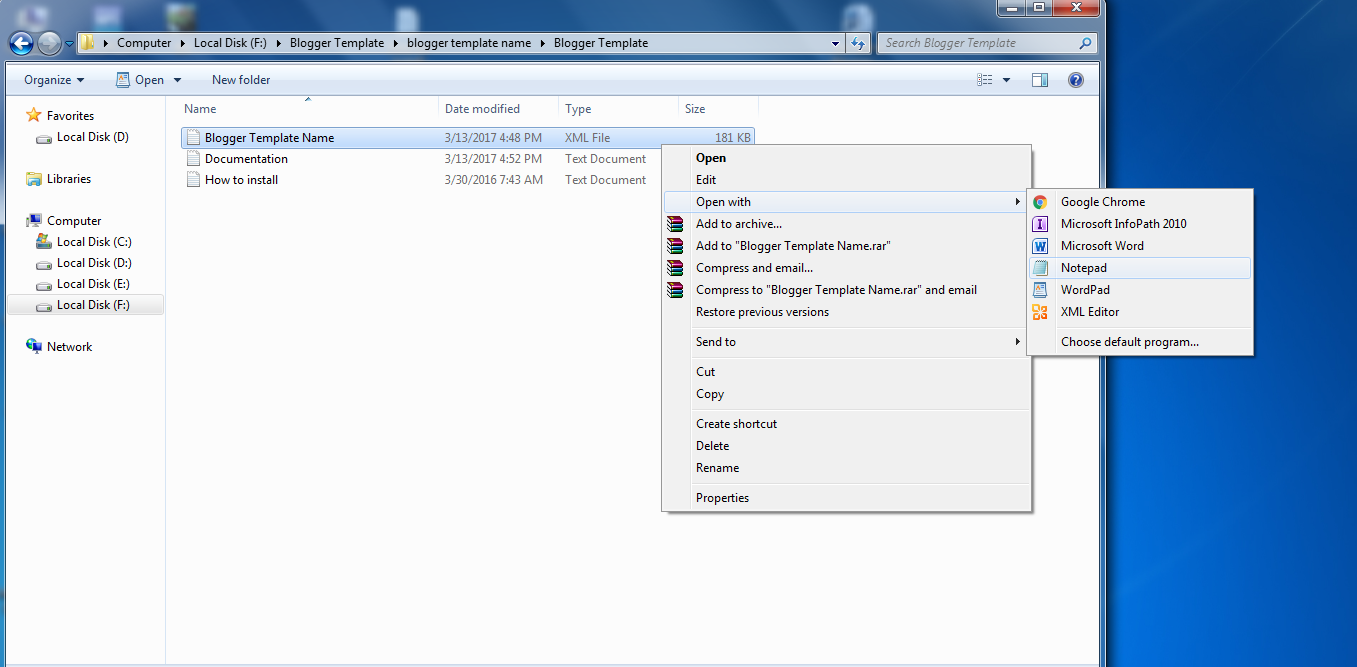
5. Open .xml file using text editor like notepad, wordpad, notpad++ or something like that.

6. In the text editor, press ctrl+a and then ctrl+c (ctrl+a to select all coding, ctrl+c to copy the selected coding)

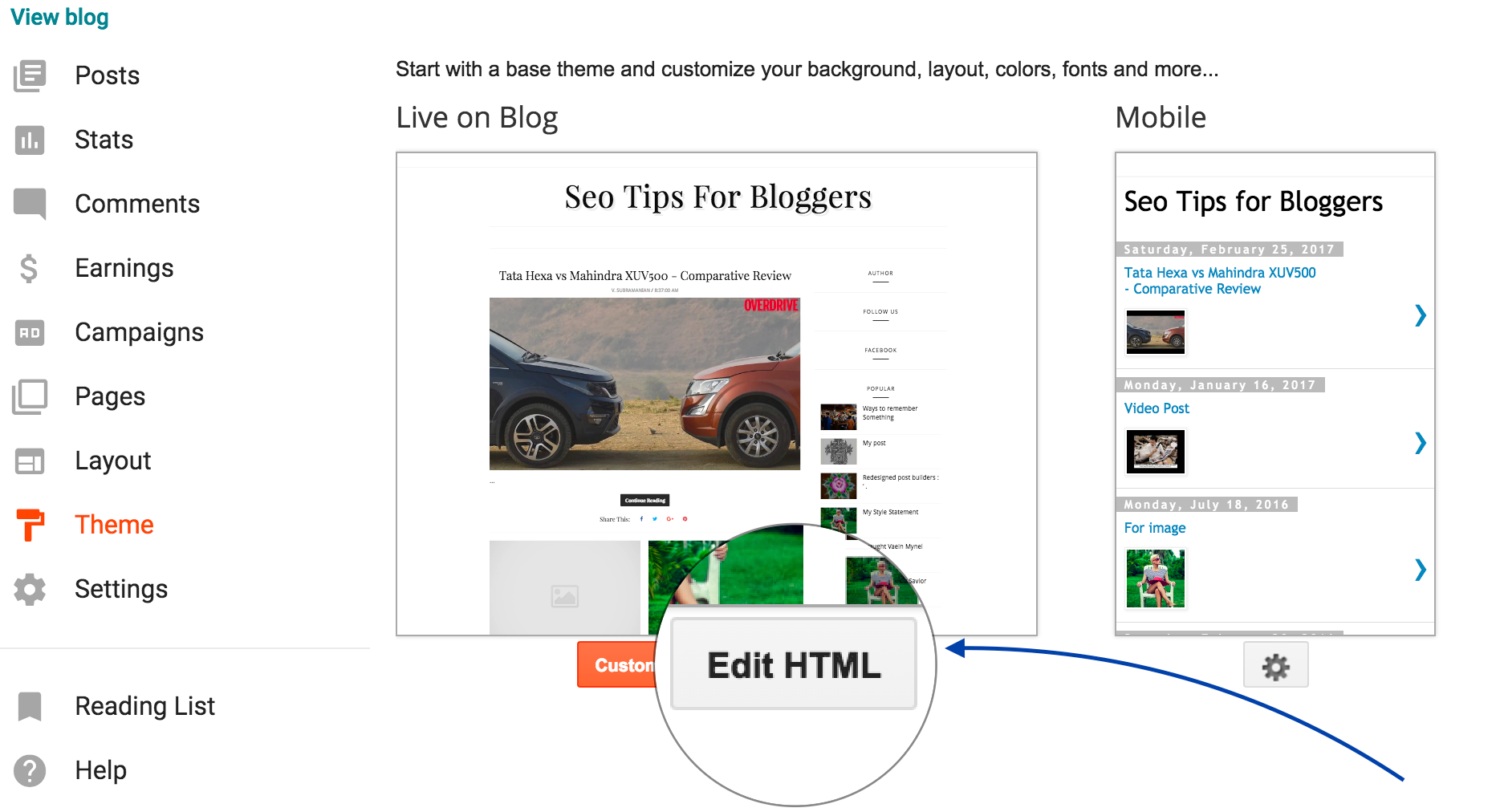
7. Now open HTML Editor on blogger dashboard and click “Edit HTML” button.

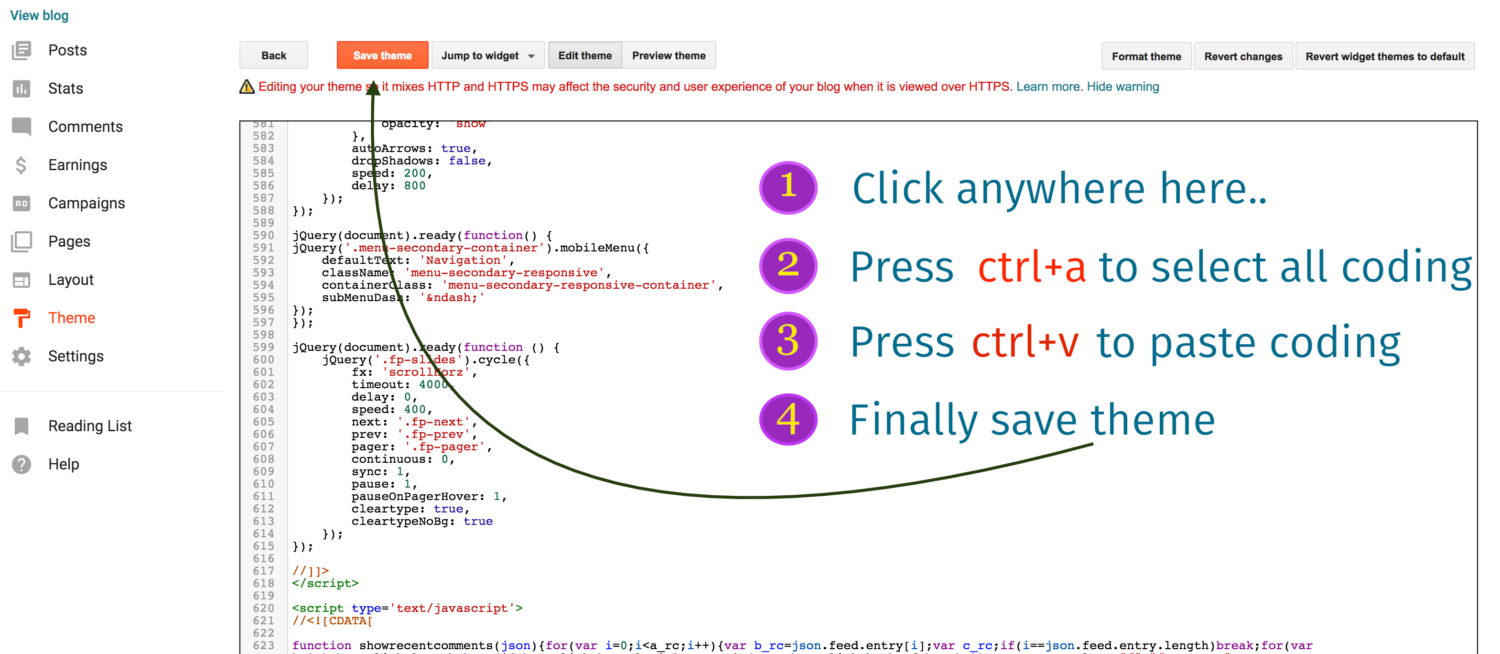
8. Click anywhere in HTML Editor. Now press ctrl+a and then ctrl+v (ctrl+a to select all coding, ctrl+v to replace selected coding with copied template coding). Finally click “Save theme” button.

Now you're done.
1. Click on the Download button and save file to PC (.xml format).
2. Log in Blogger dashboard.
3. Go to Template section → Backup/Restore.
4. Click on Download Full Template to Backup your previous template.
5. Open .xml file using text editor like notepad, wordpad, notpad++ or something like that.

6. In the text editor, press ctrl+a and then ctrl+c (ctrl+a to select all coding, ctrl+c to copy the selected coding)

7. Now open HTML Editor on blogger dashboard and click “Edit HTML” button.

8. Click anywhere in HTML Editor. Now press ctrl+a and then ctrl+v (ctrl+a to select all coding, ctrl+v to replace selected coding with copied template coding). Finally click “Save theme” button.

Now you're done.
